In this article we will see how we can use Nlphose along with Pyspark to execute a NLP pipeline and gather information about the famous journey from Jules Verne’s book ‘Around the World in 80 days‘. Here is the link to the ⬇️ Pyspark notebook used in this article.
From my personal experience what I have found is data mining from unstructured data requires use of multiple techniques. There is no single model or library that typically offers everything you need. Often you may need to use components written in different programing languages/frameworks. This is where my open source project Nlphose comes into picture. Nlphose enables creation of complex NLP pipelines in seconds, for processing static files or streaming text, using a set of simple command line tools.You can perform multiple operation on text like NER, Sentiment Analysis, Chunking, Language Identification, Q&A, 0-shot Classification and more by executing a single command in the terminal. Spark is widely used big data processing tool, which can be used to parallelize workloads.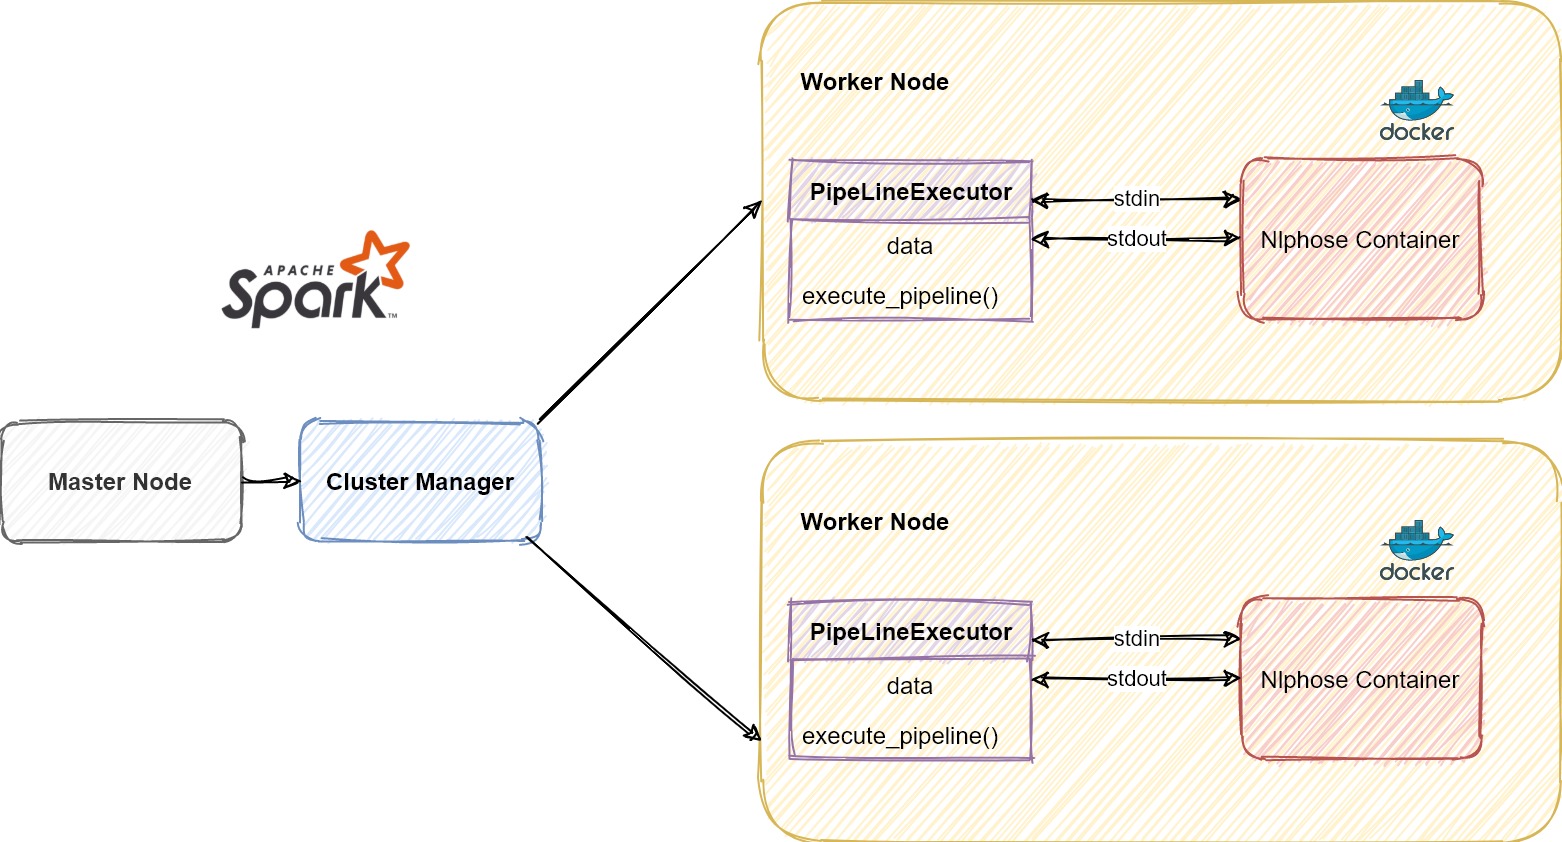
Nlphose is based on the ‘Unix tools philosophy‘. The idea is to create simple tools which can work together to accomplish multiple tasks. Nlphose scripts rely on standard ‘Filestreams’ to read and write data and can be piped together to create complex natural language processing pipelines. Every scripts reads JSON from ‘Standard Input’ and writes to ‘Standard Output’. All the script expect JSON to be encoded in nlphose compliant format and the output also needs to be nlphose compliant. You can read more details about the architecture of Nlphose here.
How is Nlphose different ?
Nlphose by design does not support Spark/Pyspark natively like SparkML. Nlphose in Pyspark relies on ‘Docker’ being installed on all nodes of the Spark cluster. This is easy to do when creating a new cluster in Google Dataproc (and should be same for any other Spark distribution). Apart from Docker Nlphose does not require any other dependency to be installed on worker nodes of the Spark cluster. We use the ‘PipeLineExecutor’ class as described below to execute Nlphose pipeline from within Pyspark.
Under the hood, this class uses the ‘subprocess‘ module to spawn a new docker container for a Spark task and executes a Nlphose pipeline. I/O is performed using stdout and stdin. This sounds very unsophisticated but that’s how I build Nlphose. It was never envisioned to support any specific computing framework or library. You can run Nlphose in many different ways, one of which is being described here.
Let’s begin
First we install a package which we will use later to construct a visualization.
!pip install wordcount |
The below command downloads the ebook ‘Around the world in 80 days’ from gutenber.org and uses a utility provided by Nlphose to segment the single text file into line delimited json. Each json object has an ‘id’ and ‘text’ attribute.
!docker run code2k13/nlphose:latest \ |
We delete all docker containers which we no longer need.
!docker system prune -f |
Let’s import all the required libraries. Read the json file which we created earlier and convert it into a pandas data frame. Then we append a ‘group_id’ column which assigns a random groupId from 0 to 3, to the rows. Once that is done we create a new PySpark dataframe and display some results.
import pandas as pd |
+---------+--------------------+--------------------+--------+ |
Running the nlphose pipeline using Pyspark
As discussed earlier Nlphose does not have native integration with Pyspark/Spark. So we create a class called ‘PipeLineExecutor’ that starts a docker container and executes a Nlphose command. This class communicates with the docker container using ‘stdin’ and ‘stdout’. Finally when the docker container completes execution, we execute ‘docker system prune -f’ to clear any unused containers. The ‘execute_pipeline’ method writes data from dataframe to stdin (line by line), reads output from stdout and returns a dataframe created from the output.
import subprocess |
The Nlphose command
The below command does multiple things:
- It starts a docker container using code2k13/nlphose:latest image from dockerhub.
- It redirects stdin, stdout and stderr of host into docker container.
- Then it runs a nlphose command inside the docker container which performs below operations on json coming from ‘stdin’ and writes output to ‘stdout’:
- Entity Recognition
- Finding answer to question ‘What did they carry?’ using a Transformer based model.
command = ''' |
The below function formats the data returned by PipelineExecutor task. The dataframe returned by ‘PipelineExecutor.execute_pipeline’ has a string column containing output from the Nlphose command. Each row in the dataframe represents a line/document output from the Nlphose command.
def get_answer(row): |
The below function, creates a ‘PipeLineExecutor’ object, passes on data to it and then calls the ‘execute_pipeline’ method on the object. Then it uses the ‘get_answer’ method to format the output of the ‘execute_pipeline’ method.
def run_pipeline(data): |
Scaling the pipeline using PySpark
We use the ‘applyInPandas‘ from PySpark to parallelize and process text at scale. PySpark automatically handles scaling of the Nlphose pipeline on the Spark cluster. The ‘run_pipeline’ method is invoked for every ‘group’ of the input data. It is important to have appropriate number of groups based on number of nodes so as to efficiently process data on the Spark cluster.
output = df.groupby("group_id").applyInPandas(run_pipeline, schema="id string,answer string,json_obj string") |
Visualizing our findings
Once we are done executing the nlphose pipeline, we set out to visualize our findings. I have created two visualizations:
- A map showing places mentioned in the book.
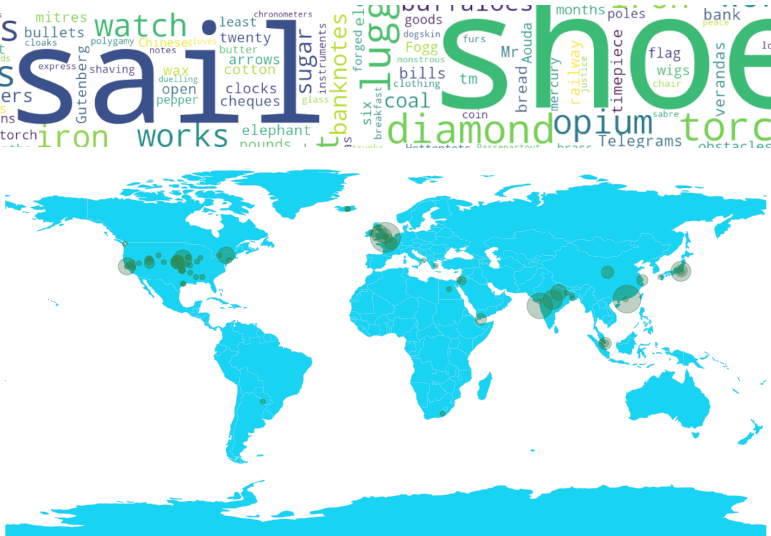
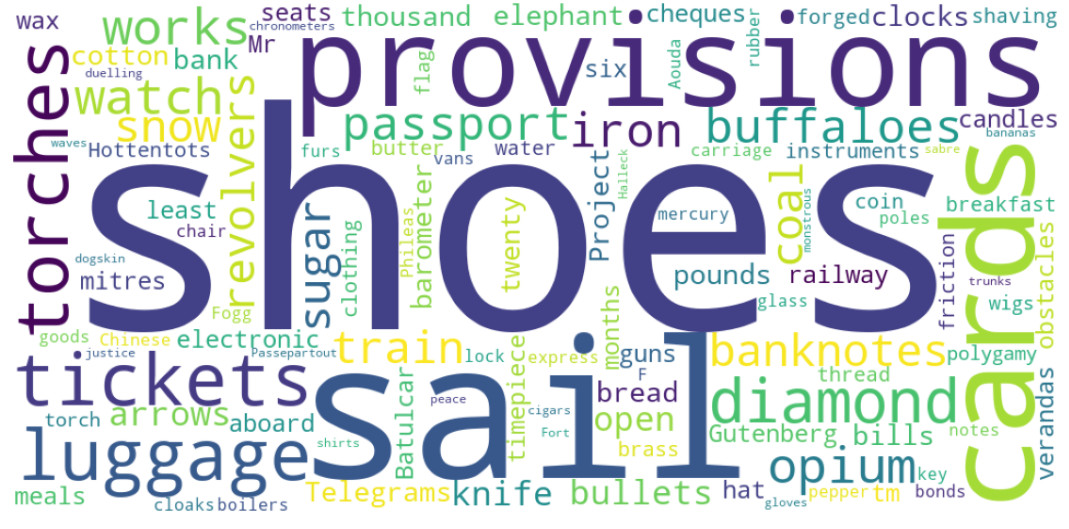
- A word cloud of all the important items the characters carried for their journey.
Plotting most common locations from the book on world map
The below code extracts latitude and longitude information from Nlphose pipeline and creates a list of most common locations.
💡 Note: Nlphose entity extraction will automatically guess coordinates for well known locations using dictionary based approach
def get_latlon2(data): |
Then we use ‘geopandas’ package to plot these locations on a world map. Before we do that we will have to transform our dataframe to the format understood by ‘geopandas’. This is done by applying the function ‘add_lat_long’
def add_lat_long(row): |
import geopandas |
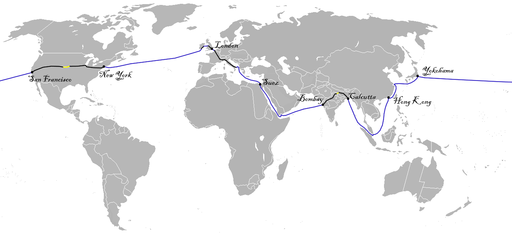
If you are familiar with this book, you will realize we have almost plotted the actual route taken by Fogg in his famous journey.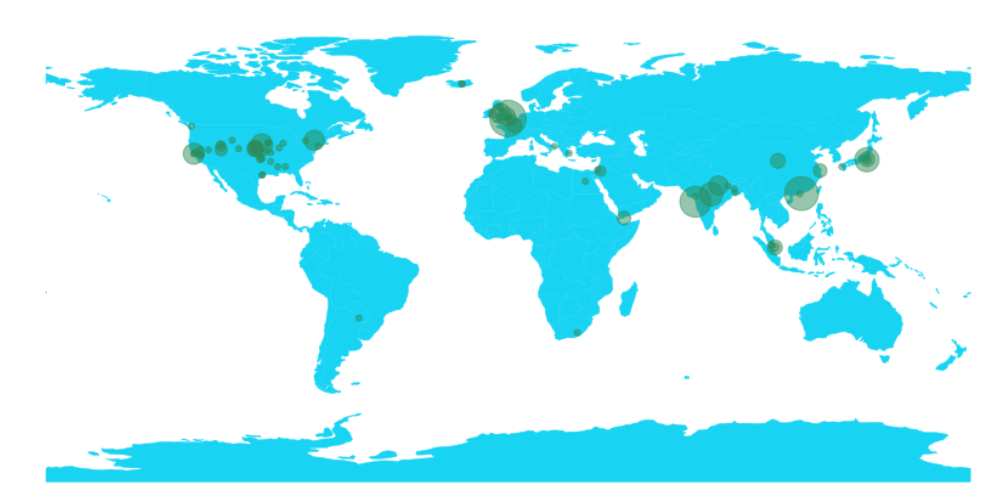
For reference, shown below is the image of actual route taken by him from wikipedia
Roke, CC BY-SA 3.0, via Wikimedia Commons
Creating a word cloud of items carried by Fogg’s on his Journey
The below code finds the most common items carried by the travellers using ‘extractive question answering’ and creates a word cloud.
from wordcloud import WordCloud, STOPWORDS |
Conclusion
One of the reasons why PySpark is a favorite tool of data scientists and ML practitioners is because working with dataframes is very convenient. This article shows how we can run Nlphose on a Spark cluster using PySpark. Using the approach described in this article we can embed Nlphose pipeline as part of our data processing pipelines very easily. Hope you liked this article. Feedback and comments are always welcomed, thank you !
