Diatoms are some of the most interesting things you can see under a foldscope/microscope. They generate about 20-50% oxygen on earth every year.
They are also known as “jewels of the sea” and “living opals”. It is believed that there are around 200000 species of diatoms. Identification of diatoms can be done by observing the shape and marks on their ‘frustules’. A frustule is the siliceous part of a diatom cell wall. Under a microscope they look like different shaped glass beads with various engravings on them.

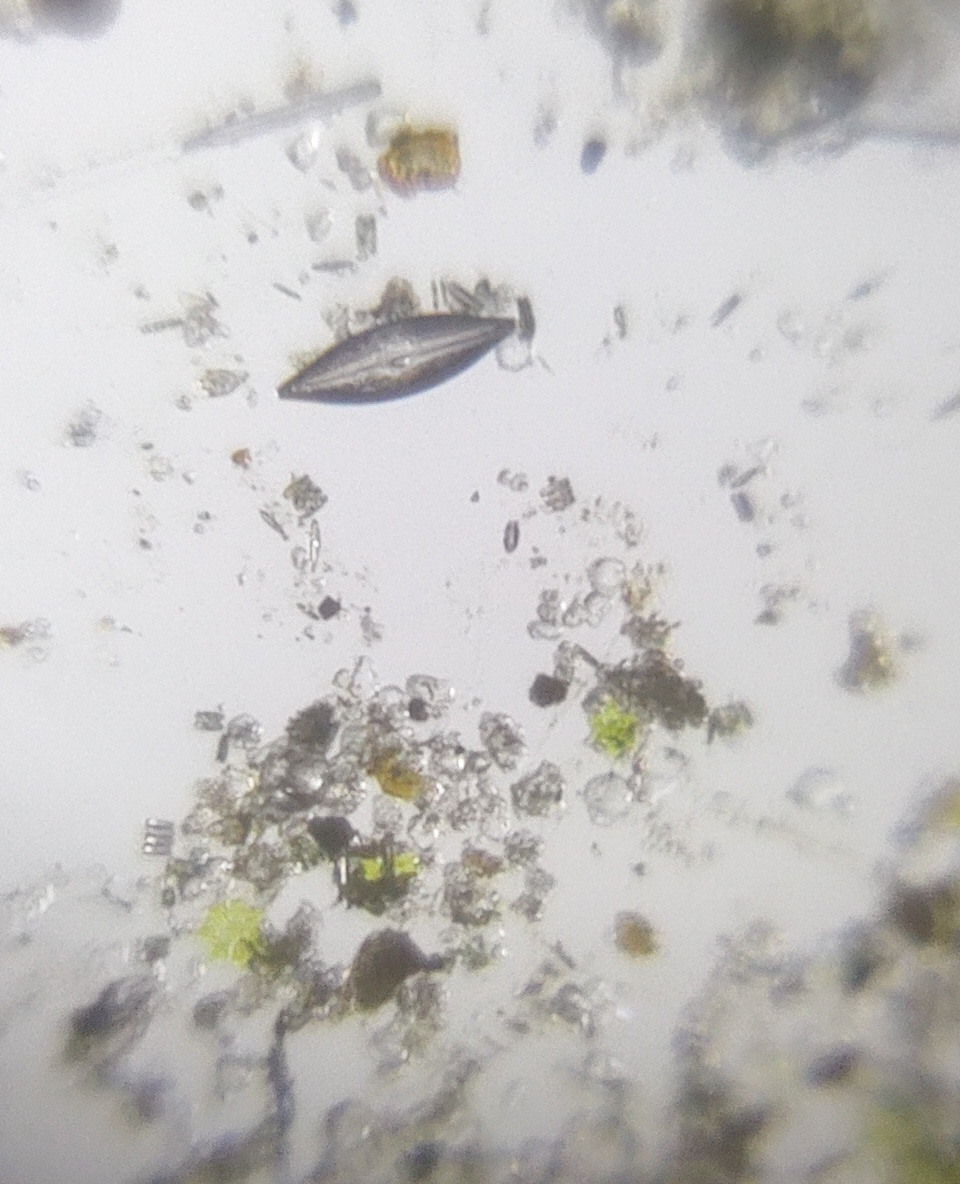
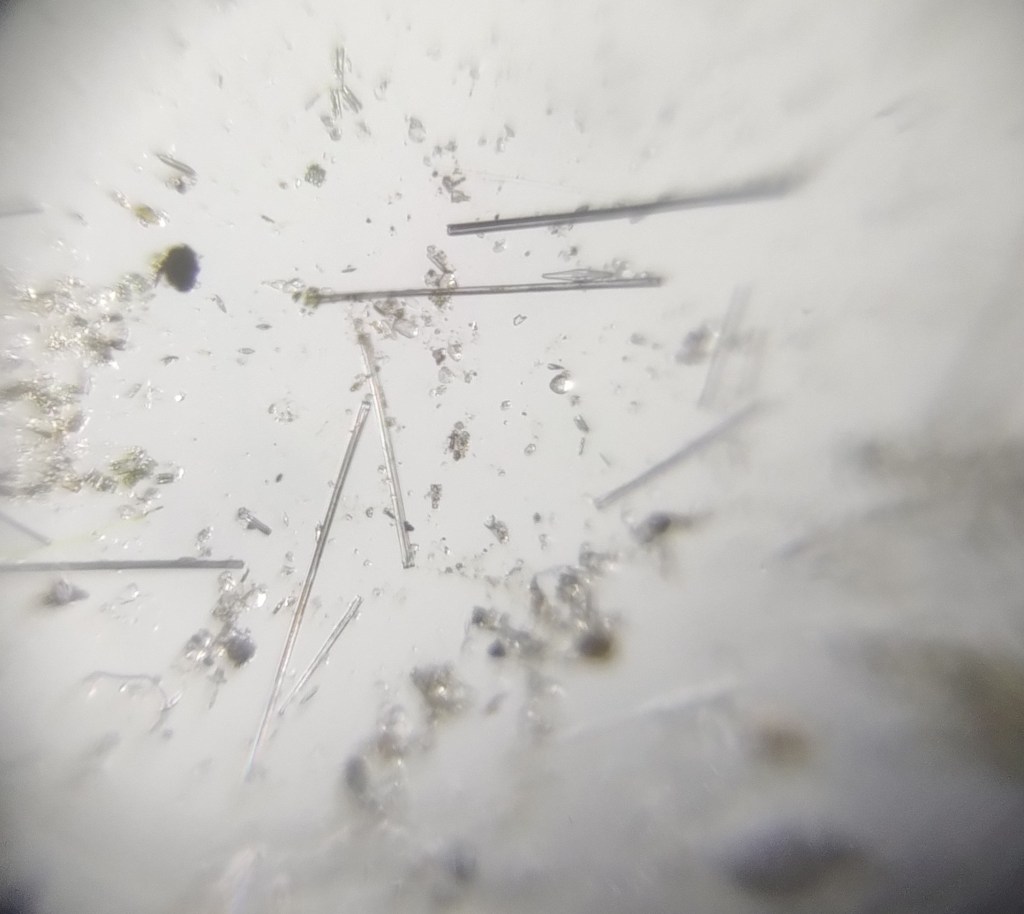
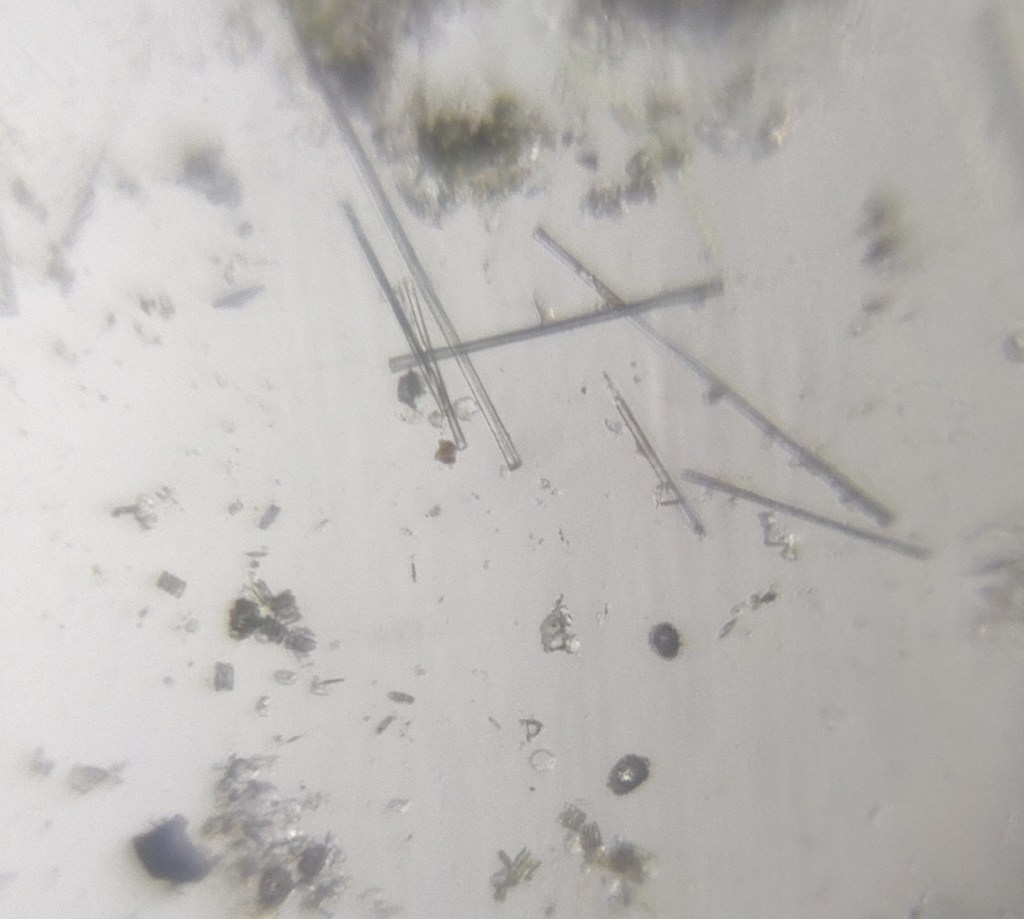
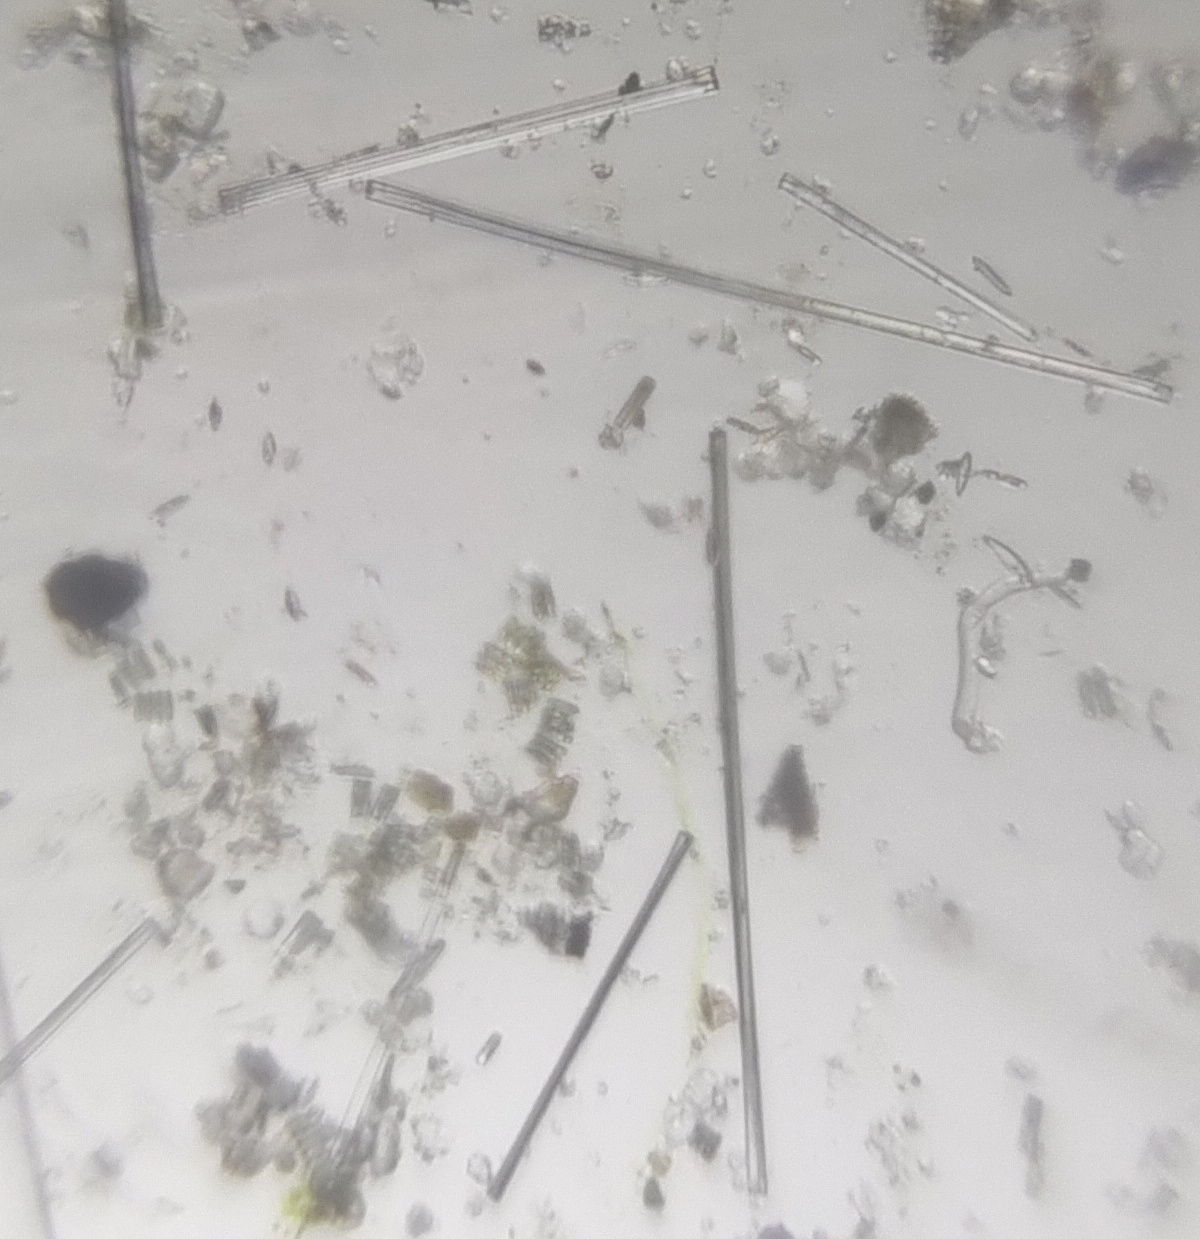
Diatoms from a single slide, collected and observed using the method described in this article. The sample was not known to contain diatoms it was collected for studying algae.
🔬This article was originally written as a guide for Foldscope users, but it should work well for all types of optical microscopes.
👏This work was possible due to lot of support and guidance from Karthick Balasubramanian of the D3 LaB. He is a expert on diatoms and has provided valuable advice for carrying these experiments
📌 Safety Considerations
Even though the experiments mentioned in the below article use household chemicals like laundry bleach and adhesives, these can be harmful if used inappropriately. Please read all safety considerations marked by ‘⚠️’ at important places in the article. Proceed with the experiments ONLY IF YOU UNDERSTAND ALL THE SAFETY CONSIDERATIONS. Adult supervision is recommended.
To observe these frustules, we have to ‘clean’ the diatoms. We need to remove pigments and matter inside the diatom cell, so that we observe these ‘frustules’ under a microscope and identify the species of diatoms. There are well established laboratory methods for doing this. These involve use of hazardous chemicals , acids and heat. These methods are not suitable for use in a school or at home. This article explains a simpler and much safer method for cleaning and mounting diatoms.
What you will need
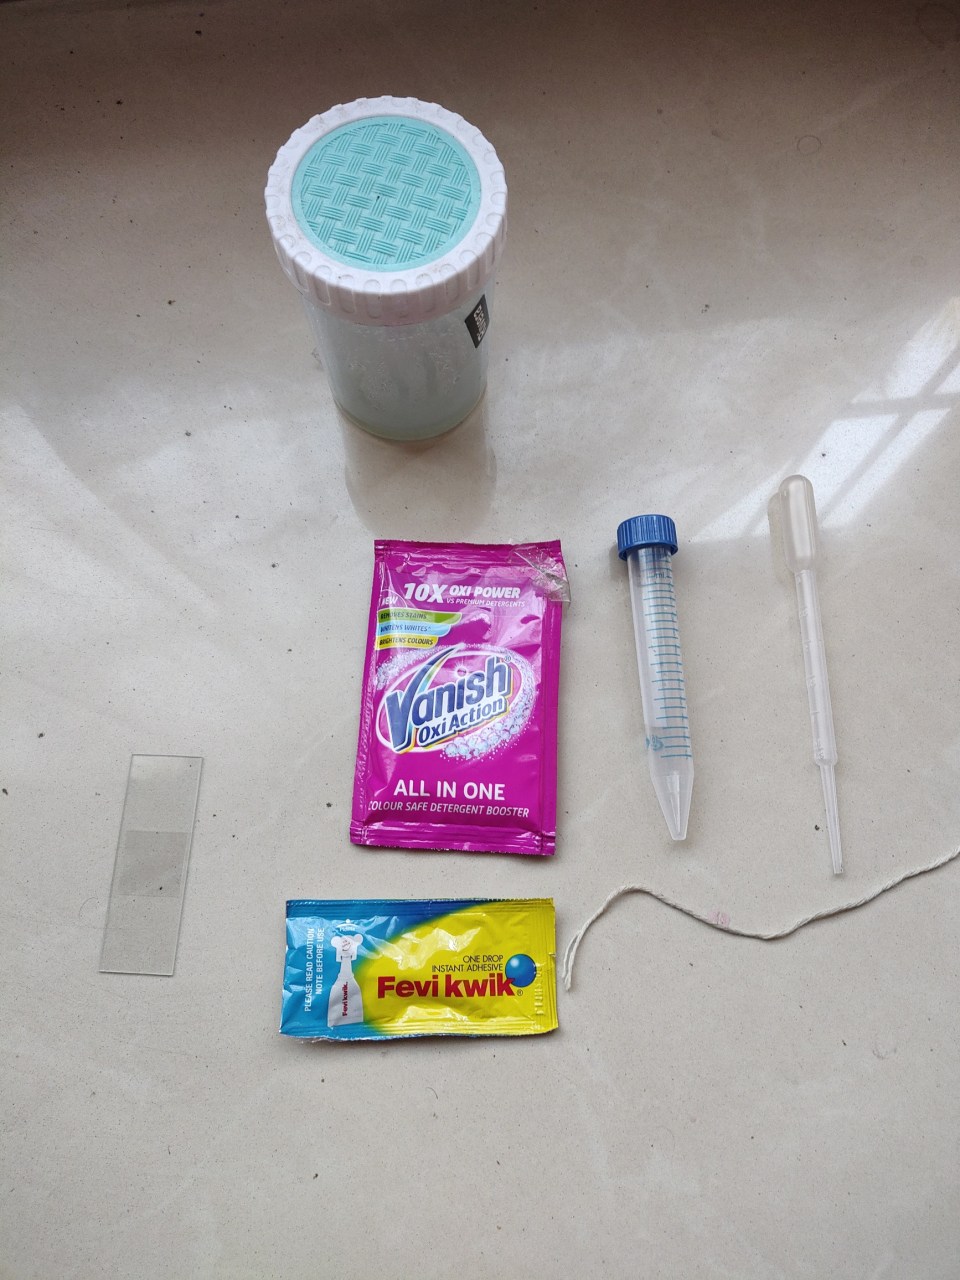
You will need the following items:
- Centrifuge Tubes (easily available online)
- Pipettes (easily available online)
- Fevi kwik (transparent general purpose instant adhesive)
- Vanish (or similar laundry bleach/detergent additive)
- Piece of strong thread
- Glass slides and coverslips
- Water sample containing diatoms
- Patience
Collecting Diatoms
Diatoms are present in abundance in most saltwater and freshwater bodies. For the purpose of this experiment I collected a small sample of water from an artificial pond . The pond was filled with algae, and I wasn’t aware if it had any diatoms in it. You can try collecting water from different places and check it for diatoms. You can also follow instructions mentioned in this YouTube video: Diatoms. Part 1: Introduction and collection of diatoms – YouTube
Cleaning Diatoms
This is the most important and time consuming part of the process. Cleaning helps remove matter inside the diatom cell and separate diatoms from other debris. Labs use acids and other chemicals for this process. We will use a laundry bleach (Vanish brand available in India) to do the same. This particular item is sold as a detergent additive and claims to have 10x more oxidizing power compared to a normal detergent (just what we want !).
⚠️ Adult supervision is recommended. Be very careful when working with bleach of any kind. Wear gloves if you are not sure how strong the bleach is. Avoid spilling bleach on your skin and other body parts. Read information on the packet/box before using. Consult an expert if you are unsure.
Here are the steps for cleaning the diatoms:
STEP 1
Take about 30ml of water and mix 1/4 teaspoon of the detergent additive (Vanish) in it, in an OPEN container. Make sure it is fully dissolved. The quantity of water and amount of bleach would depend on the strength of your bleach.
⚠️ DO NOT keep this solution in a closed or airtight container, because gases can build up pressure inside the container.
Oxidation of the sample causes generation of bubbles and release of gas. Keep the tube open.
STEP 2
Take a few drops of water from the sample you have collected using a pipette in a centrifuge tube. Try to take few drops from the bottom of the sample. It is fine if there is some algae and debris in it.
STEP 3
Add 10 – 15 drops of the bleach solution we created in STEP 1 and let the solution settle for some time, say 60 minutes.
⚠️ DO NOT close the cap on this centrifuge tube. You should see air bubbles inside the tube as the sample gets oxidised.
STEP 4
Once there are no more air bubbles or their generation has slowed down considerably, we need to centrifuge the mixture. Before that we should remove all the excess liquid very carefully from the tube using a pipette. Just leave behind the settled in debris at the bottom and only a 0.5 cm deep layer of water on top of it. Once we have gotten rid of most of the bleach, we should fill half of the tube with clean water.
DIY centrifuge !!
⚠️ Excess gas buildup in closed tube can be dangerous. We are getting rid of most of the bleach before centrifuging the mixture. This should ensure that gas build up during the centrifugation process is minimal and mitigates any risk.
STEP 5
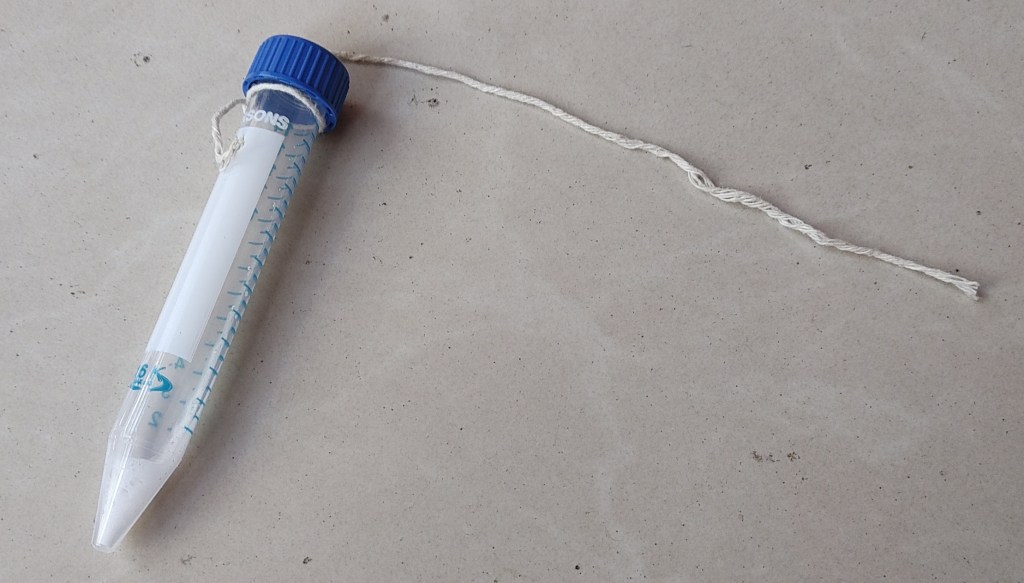
Screw in the cap on the centrifuge tube. Tie a 30-40 cm long thread tightly just below the cap as shown in the below figure.
STEP 6
Hold one end of the thread in your hand and start moving the tube in circles in a horizontal plane as shown in below the figure for a minute.
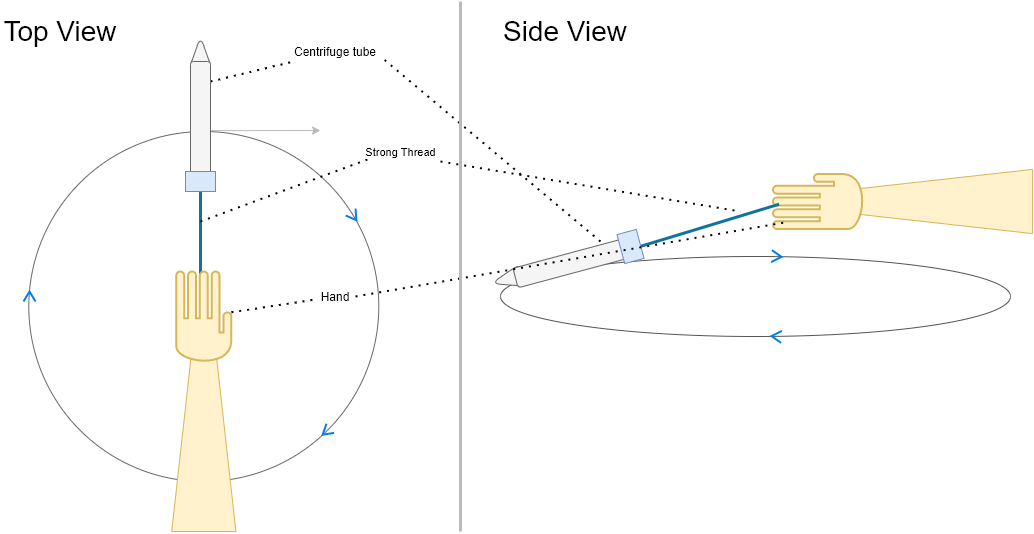
Operating the DIY centrifuge !!
⚠️ Make sure the thread is strong and tightly tied around the base of the centrifuge cap. Also ensure that you do this in open space to avoid hurting anyone or hitting anything.
STEP 7
Remove the cap of the centrifuge tube carefully and put it back on after a few seconds to let any gases escape. Keep it standing still on its pointed end for about 10 minutes by resting it vertically against a wall. You should see matter settling down at the bottom of the tube.
STEP 8
At this stage remove the cap of the centrifuge tube again and very carefully remove excess water using a pipette while leaving the matter at the base of the tube intact. I generally keep a thin layer of water (0.5 cm) above the settled debris. Now fill the tube carefully with clean water so that it is half full. Repeat steps 6,7 and 8 two more times to wash out any bleach or soap remaining inside the tube.
STEP 9
Remove all excess water , keeping a thin layer of water (say 0.5 cm) above the settled down matter. Keep the tube in a vertical position all the time, do not invert the tube.
Congratulations !! You have cleaned your first batch of diatoms. It is now time to mount them on a slide.
Creating the slide
Once the mixture in the tube has settled down, it is time to create a slide. You can create a slide from this sample without using any mounting medium. But I would highly recommend using a mounting medium for two reasons:
In the Foldscope (as opposed to conventional microscopes), slides are held vertically when viewing.The coverslip and slide are pressed hard together by two magnets on both sides. This can put a lot of pressure on cover slip, especially during focusing. Diatom frustules are fragile and may break.
There are many high refractive index mounting mediums which are used for diatoms like Naphrax, Zrax, Pleurax and Hyrax , which may be hard to find (depending on where you live) and expensive. Also heating is involved when using them and toxic fumes are released on heating them. I tried to use Pleurax and heated the slide using a candle. The medium did not harden and my slide was sticky and a total mess to work with. This is why I recommend using ‘Fevi kwick’ or any of those general purpose transparent liquid instant adhesives (these go by different brand names). These are cheap and readily available. But there is one problem, they harden very fast, in a matter of a couple of seconds. You have to be very precise with your slide placement in the first attempt itself. You won’t be able to adjust the slide after it makes contact with the adhesive.
⚠️ Please read information on the adhesive packet about safety and usage. Wear gloves if required. These things are super sticky and are not easily removable if they come in contact with your skin or fingers.
To mount the diatom specimen follow these steps:
STEP 1
Using a pipette, take only a couple of drops of water from the very end of centrifuge tube containing the cleaned diatoms. This can be tricky. If you take in more water , hold the pipette still in a vertical position for a couple of minutes.
STEP 2
Now carefully place a drop of this water from the pipette onto the centre of an empty glass slide. Spread the drop slightly using the same pipette so as to cover area equal to that of a cover slip.
STEP 3
Let the slide dry. This can take a few minutes. You should see white powdery residue on the slide. This residue contains our diatoms.
✔️ If you don’t want to work with adhesives , you can skip steps 4,5 and 6. Instead just place a cover slip on the white powdery portion, secure the sides with transparent tape and move to step 7.
STEP 4
Now very carefully place a drop of adhesive on top of the powdery spot on the slide.
STEP 5
Hold the coverslip using tongs (recommended) or your fingernails (wearing gloves recommended) and place it on the adhesive drop. Immediately the tap center of the coverslip gently using a blunt object.
STEP 6
The coverslip will stick to the slide within a couple of seconds. If you made a mistake you will have to start over with new a slide and coverslip. (Always save some sample for such scenarios).
STEP 7
Congratulations !! You have created a slide out of your diatom sample.
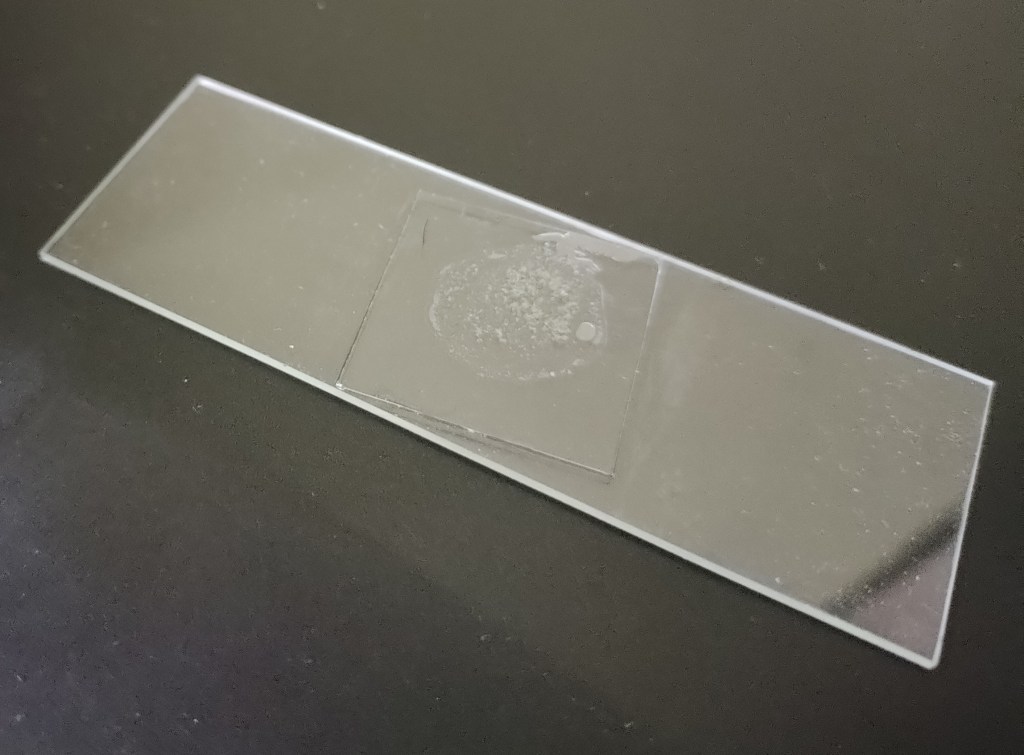
Permanent slide using transparent instant adhesive.
Viewing the Slide and Taking Pictures
If you plan to take pictures of these diatoms, make sure you have the LED Magnifier attachment for Foldscope.
LED Magnifier Kit – (Contains 20 LED/Magnifier Lights. This does not i – Foldscope Instruments, Inc. (teamfoldscope.myshopify.com)
Proper lighting and focus is very important for capturing the details of diatoms. From my personal experience I have found some mobile phone cameras are better at focusing when used with Foldscope compared to others. Take lots of pictures and upload the best ones here on microcosmos. Below are some more images taken from a single slide created using the technique explained in this article.
Hope this information was useful to you all. Please share your comments and suggestions. Happy diatom hunting !!
References
Diatoms. Part 1: Introduction and collection of diatoms – YouTube


