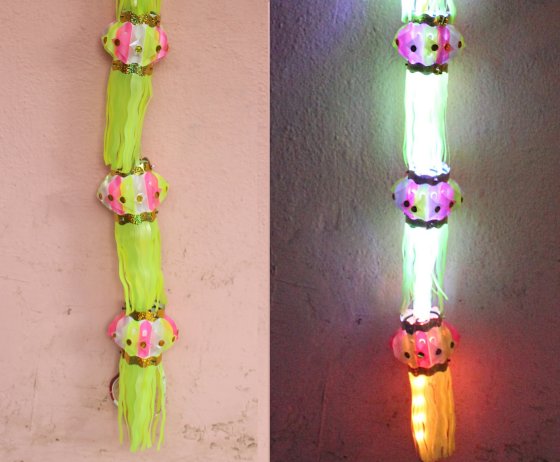
Since a long time I wanted to create something cool using LEDs and Arduino for Diwali. For those who don’t know, ‘Diwali’ is known as ‘festival of lights’ in India. During Diwali you will see houses and buildings decorated with earthen lamps (called ‘diyas’), lanterns and LED lights. Shown below is the cool programmable color changing lantern decoration which created using Arduino.
What I used
- Arduino Uno (or clone)
- Led strip (WS2812b 5v) x 1 meter
- Small Diwali lantern x 4 [the translucent ones, which can be fitted with a small bulb]
- Plastic string or wire to tie the lanterns one below another.
Construction
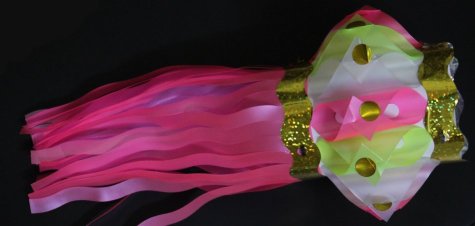
Construction is simple but is very important to select the right lanterns. In India, small golden or silver colored lanterns are easily available and are cheap. But these are not translucent (they are intended for daytime decoration). If you search in the shops, you will find translucent, similar sized lanterns (basically these are the smallest sized replicas of common lanterns). Given below is the photo of a correct type of lantern.
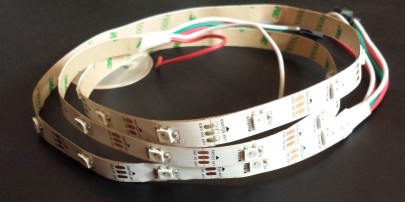
I tied all the four lanterns one below the other. There can be many ways to do this. I used thin plastic rope to tie-up the lanterns together. These lanterns have inner plastic ring with spokes at the top, which can be used to tie the string/rope. I ensured that the rope is not easily visible and mostly hidden when suspended. Also the height of my lantern chain when suspended had to be be roughly equal to one meter. In my case, I decided to only use 28 out of 30 LEDs on the strip. Once the lanterns were tied and a chain is created, next step was to fix the LED strip inside the lantern. I simply tied one end of the strip to the inner ring of the topmost lantern and suspend the remaining portion of strip into the ‘hollow’ of the lantern chain. Interfacing the LED strip was very simple. The strip has three wires which I connected as follows :
| LED strip | Arduino |
|---|---|
| Data | PD3 |
| VCC | 5V |
| GND | GND |
Important
Lot of articles on the Internet advocate using a separate power supply for the LED strip. I managed to get it work by directly connecting it to my board (I was using Arduino clone). Maybe because, I only had 1 meter long strip. For anything longer please consider adding a separate power supply.
Once I was done with my hardware, it was time to connect the strip to my Arduino board and write some code.
The Software
To work with the LED strip you need to FastLED library for Arduino. The library comes with cool examples and descent documentation. Initially I wrote a few programs for the LED strip using basic RGB color manipulation (tried to play with random values with RGB). I soon realized that this does not produce a nice visual effect. The best way to produce visual effects with distinguishable colors was to use FastLED HSV colors
|
Finally !
Hope you enjoyed reading this article. If you creating something similar, please feel free to share with me !


