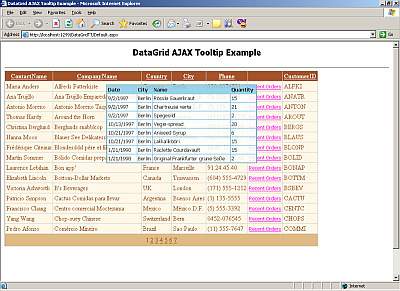
This article is about creating a AJAX based tooltip for the ASP.NET DataGrid. In a simple demonstration, I’ll show how to put things together and get them working. The main page consists of normal DataGridView, showing customer information and a template column which says ‘Recent Orders’ . When the user moves his/her cursor over the text, a cool animated translucent tooltip appears for the row, showing ten recent orders by that customer.
The ingredients (this is required):
1. Northwind database
2. ASP.NET 2.0 (Version 1.x might work)
3. My tooltip script Tooltip.js
4. Prototype.js
5. Some experience with ASP.NET and datagrid.
Downloading and running the code
- Download the DataGridTT.zip.
- Download the prototype.js and add it to the project.
- Modify the web.config file of the downloaded project. Change the ‘NorthwindConnectionString’, so that it points to the ‘Northwind’ database on your server.
Create Main Page
I am not spending time explaining this. You should refer to the source for this. The main page consists of a simple datagrid, bound to a typed dataset. The query used for fetching data from Northwind database is:
SELECT ContactName, CompanyName, ContactTitle, Country, City, Phone, CustomerID |
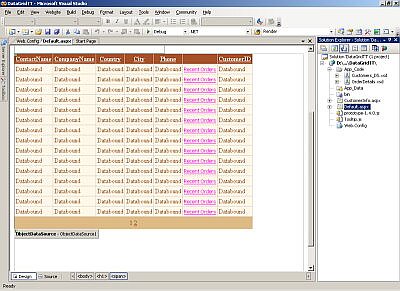
This is how the datagrid looks in designer.
The column with ‘Recent Orders’ is a template column with a ‘Label’ control over it. You should be able to figure out things if you have Visual Studio 2005 and the source code. There is nothing really special here.
Creating the server side AJAX method
Okay, now we require a URL from where we can get data for our tooltip. I have chosen to create a empty (totally blank) *.aspx page, called CustomerInfo.aspx. If you see the code for his page, it has code for only two functions ‘Page_Load’ and ‘DSToJSON’ . This page expects a parameter ‘CustID’ which is nothing but the CustomerID corresponding to the row of grid for which tooltip is displayed. The page ‘CustomerInfo.aspx’ retrieves data from the database based on ‘CustID’ using the following query:
SELECT TOP 10 Orders.ShippedDate, Orders.ShipCity, Orders.ShipCountry, |
There is an important method, ‘DSToJSON’ which converts dataset containing results of above query to JSON representation. If you are new to JSON visit this link. This method returns JSON string for the data which is output to the caller via Response.Write method. The code for this method is given below:
private string DSToJSON() |
Client Side code
Now we will have to add some client side code to our main page for displaying the tooltip. As discussed earlier, I will be using my Tooltip.js javascript for the tooltip. You should visit this link and find out more about. You will find following client side javascript functions in the Default.aspx._
function init()
Creates the tooltip using a hidden tag as template. Called when window.load fires. This function is called using prototype libraries ‘Event.observe’ mechanism.
function showDetails(e,custId)
Initiates an AJAX request for the ‘custId’ to fetch data from the sever , using ‘Ajax.Request’ method from prototype.js for AJAX. Shows ‘Loading…’ text in the tooltip.
function showTooltip(res)
Processes the response form server, creates pretty looking HTML table containing the data and shows it into the tooltip.
function hideTooltip(e)
Hides the tooltip Refer to the Default.aspx file for the code of these functions. Here one important thing I would like to tell you is to place the datagrid in a with some descent height. This is required for proper functioning of tooltip. So when the mouse pointer moves over any ‘Recent Orders’ label ‘showDetails()’ needs to be called and ‘hideTooltip()’ when it moves out of it.
Connecting client and server for AJAX
Once we have all the things ready on client side, it is now time to write server side code that outputs correct HTML that will make things happen. This part is the most important. In the handler of ‘RowDataBound’ of the grid we write following code
protected void GridView1_RowDataBound(object sender, GridViewRowEventArgs e) |
All the above code does is attaching appropriate function calls to the ‘onmouseover’ and ‘onmouseout’ events of the label in the template column. Also notice the ‘CustId’ is also getting passed for the corresponding row. This is very important for the system to work. Thats it , we are done ! I strongly recommend that you should download and study the code a bit before trying out this. This was just an example where we considered a simple case. With more creativity and code , it will be possible to produce more useful functionality and spectacular looking interface. Please email me your opinion, suggestions and criticism .


