When we talk of editing an image, the first name that comes to Windows users is ‘Paint’. But most of us will agree that this little program can do very limited when it comes to image editing. A professional image editing software can cost you dear, considering your need. Are you looking for an alternative that is free, feature rich and reliable? Your search ends here. GIMP stands for ‘GNU’s Image Manipulation Program’. GIMP is a high quality open source program for working with pictures and images. It is a default installation on most modern Unix/Linux systems. The windows version for GIMP has been around for quite a while, but hasn’t become as popular as some other open source software. The windows version of this software works as good as the Linux version and we will see that ourselves in this article.
Getting GIMP
GIMP for windows comes in a nice self-installing package (setup.exe) from this site http://gimp-win.sourceforge.net/ . If you are an open source freak, you can even download the source code for GIMP and compile it on your machine. One important thing here; GIMP was made using GTK+ , so you have to install GTK+ before installing GIMP. Installable of GIMP as well as GTK+ are available from the above mentioned site. GTK+ is set of runtimes required by the graphics library used by GIMP. If you already have GTK+ installed on your system you can skip this step. Package for GIMP is about 8Mb in size , and GTK+ around 5 Mb.
Using GIMP
Once you install GIMP , you would be very eager to explore this wonderful tool. When you click on its icon under ‘Start Menu‘ you will see the main window with following entries on the toolbar ‘File, Xtns and Help‘. The screen does not look spectacular at this moment, but click on the ‘File->New‘, and then ‘OK’. This will create a new image file in separate window apart from the main window. Now you can see familiar looking entries on the menu of this window like ‘File, View, Edit, Select¦.‘. Click on the ‘Dialogs‘ item , and you should see a menu showing different dialogs that can be made visible , like ‘ Colors, Brushes,Gradients,Patterns ‘ etc.
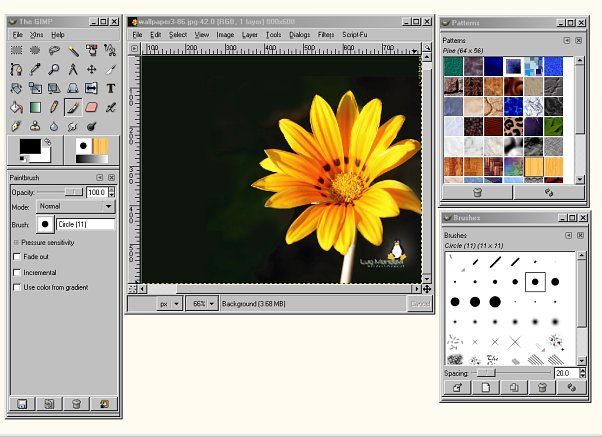
With a little experimentation, you should be able to create simple drawings. If you have used other image editing software then using GIMP should be really very easy. Some prominent features of GIMP are: Over 25+ image format supported. The GIF image standard is used to store images with transparency (non-rectangular images), while the PNG format is used for image that can be translucent, useful for web and UI designers. GIMP can even store an image as a C program, which is really cool. Other interesting formats supported include bzip(compressed format), postscript, ico (windows icon) and even HTML ( table with colored cells). GIMP can store image in form of layers. This is helpful for complex image processing tasks, where you can save your image as layers and later open it work on those individual layers. GIMP also has the ‘magic wand tool’, which is very useful for selecting similar colored irregular areas in an image. This tool is generally not seen in many low end image editing programs. It has over 150 standard effects and filters . Just click on ‘Filters’ in the main menu. You will see a list of categories of different filters. Each category has several nice filters. The ‘Scripting-Fu’ is my favorite. It makes lot of really awesome looking artwork available at click of single mouse button. We will definitely give it a close look later.
My favourite GIMP tricks
Do your screenshots or images look poor in quality, once you export them into JPEG format ? Or you wished you could furture compress a JPEG image . This is where GIMP comes in handy. Once you specify the extension for saving a file as ‘*.jpg’ , GIMP asks you how much to compress the image. More compression means lesser quality of the resulting image.
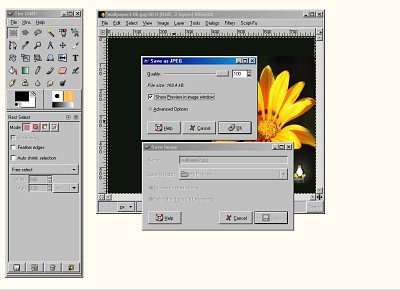
Setting compression level for images using GIMP
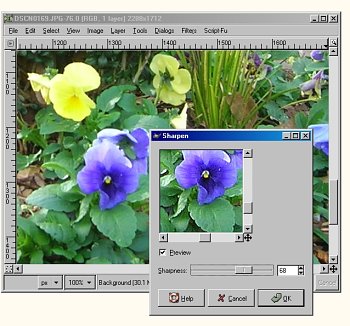
Want to tweak those blur looking images from your digital camera! Try the ‘Sharpen‘ filter. From ‘Filters‘ menu select ‘Enchace>Sharpen ‘. You can select how much sharp you want your image to be. Many blur images can be made to look somewhat crisp by using this filter.
You will definitely love this one. Have you noticed that adding shadow to photos makes them look awesome on webpages and magazines. You can achieve this using by a single click in GIMP. Open your image and from ‘Script-Fu‘ menu select ‘Shadow>Drop Shadow ‘. One important thing to note here is to save the image in PNG format, or else your image will show shadow on default white background. Send such images via email to your friends and they will be impressed by the professional look.
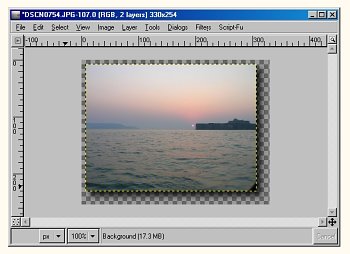
Using the ‘drop shadow’ function(click to enlarge)
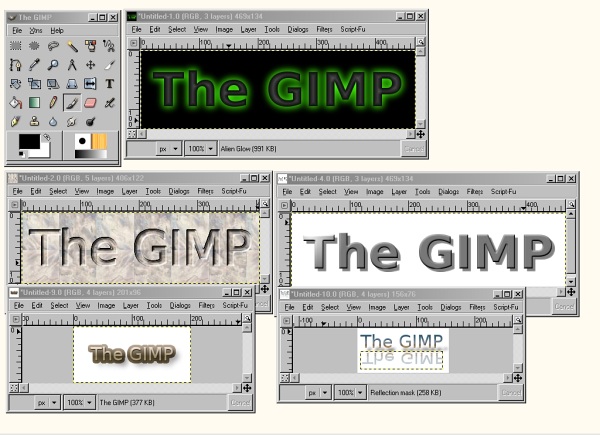
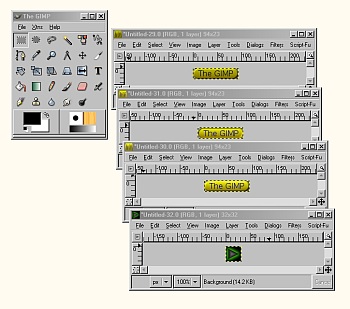
GIMP creates professional looking logos for you in no time. From the ‘Xtns‘ in the main menu select ‘Script-Fu>Logos ‘, you will see a list of all kinds of logos GIMP can make for you. Click on a few, accept default settings by clicking ‘OK’ and see what happens. Impressed !! You can supply text and alter properties for each type of logos to create amazing custom made effects.[
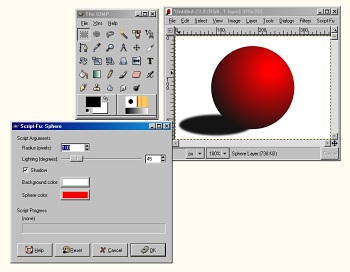
The ‘Sphere‘ function under ‘_Xtns>Script-Fu>Misc>Sphere.. ‘ is a unique one. It creates a cool 3D looking sphere for given color and radius. Great for using in webpages and other graphics.
GIMP is so very well designed! You can generate quite a few types of bullets, textures and buttons for webpages at the click of a button. Using ‘Xtns>Script-Fu>Buttons‘ and ‘Xtns>Script-Fu>Web Page Themes ‘ functions you can generate different types of buttons and bullets for your website.
Tutorial and Documentation
If you are thrilled by reading this article so far, then you will definitely go crazy when you visit this site: http://www.gimp.org/tutorials/. A must see site for all interested in digital photography . This collection of tutorial actually teaches you how to create some spectacular and professional looking art with your photos and GIMP. There is also a comprehensive free ebook on GIMP at http://gimp-savvy.com/BOOK/ . The official web site (http://www.gimp.org/) contains lot of imformation, do have a look . You may find more interesting links on the wikipedia entry for GIMP here: http://en.wikipedia.org/wiki/GIMP. The official wiki for GIMP is located at http://wiki.gimp.org. Even googling for ‘GIMP tutorials’ will give you hundreds of sites. There is no lack of documentation and tutorials for this tool. As you can see yourself, GIMP is very well designed. It doesn’t try to be a full-fledged complex image processing program. It has been made so simple, that anyone can use it. It gives you easy access to many general image manipulation tasks. Also its ability to generate logos, buttons, bullets, and graphics make it a very useful tool for anyone with modest graphics designing needs. A major complain with open source software is lack of proper documentation and support. We saw that this is certainly not the case with GIMP.Creative ones can spend hours working with GIMP and even normal people like you and me cannot afford to miss this wonderful and productive tool.


