Previously, I implemented handwritten digit classification using CircuitPython and an SVC classifier. While this approach was innovative, it had its limitations, including low accuracy and an inability to handle larger images. Recently, I experienced limited success porting some deep neural networks to CircuitPython, which inspired me to explore implementing Convolutional Neural Networks (CNNs) within this environment.
Handwritten digits being classified using CNN running on Raspberry Pi Pico and CircuitPython.
Link to the code: https://github.com/code2k13/cnn_circuit_python
The challenge was significant due to memory constraints and the complexity of CNN implementation. Nevertheless, I developed a workflow that allows for training models using TensorFlow/Keras on a PC and subsequently porting them to CircuitPython. To date, I have successfully implemented Conv2D, Max Pooling, Softmax, and Dense layers in CircuitPython. Although my code is not yet modular, it serves as a useful reference implementation.
It is important to manage expectations regarding performance; achieving 30 frames per second on a CircuitPython board like the Raspberry Pi Pico is not feasible. A more realistic performance metric is around 2-3 seconds per frame. Despite the slow processing speed, this implementation represents a significant step forward in bringing advanced neural network capabilities to the CircuitPython ecosystem.
The Workflow
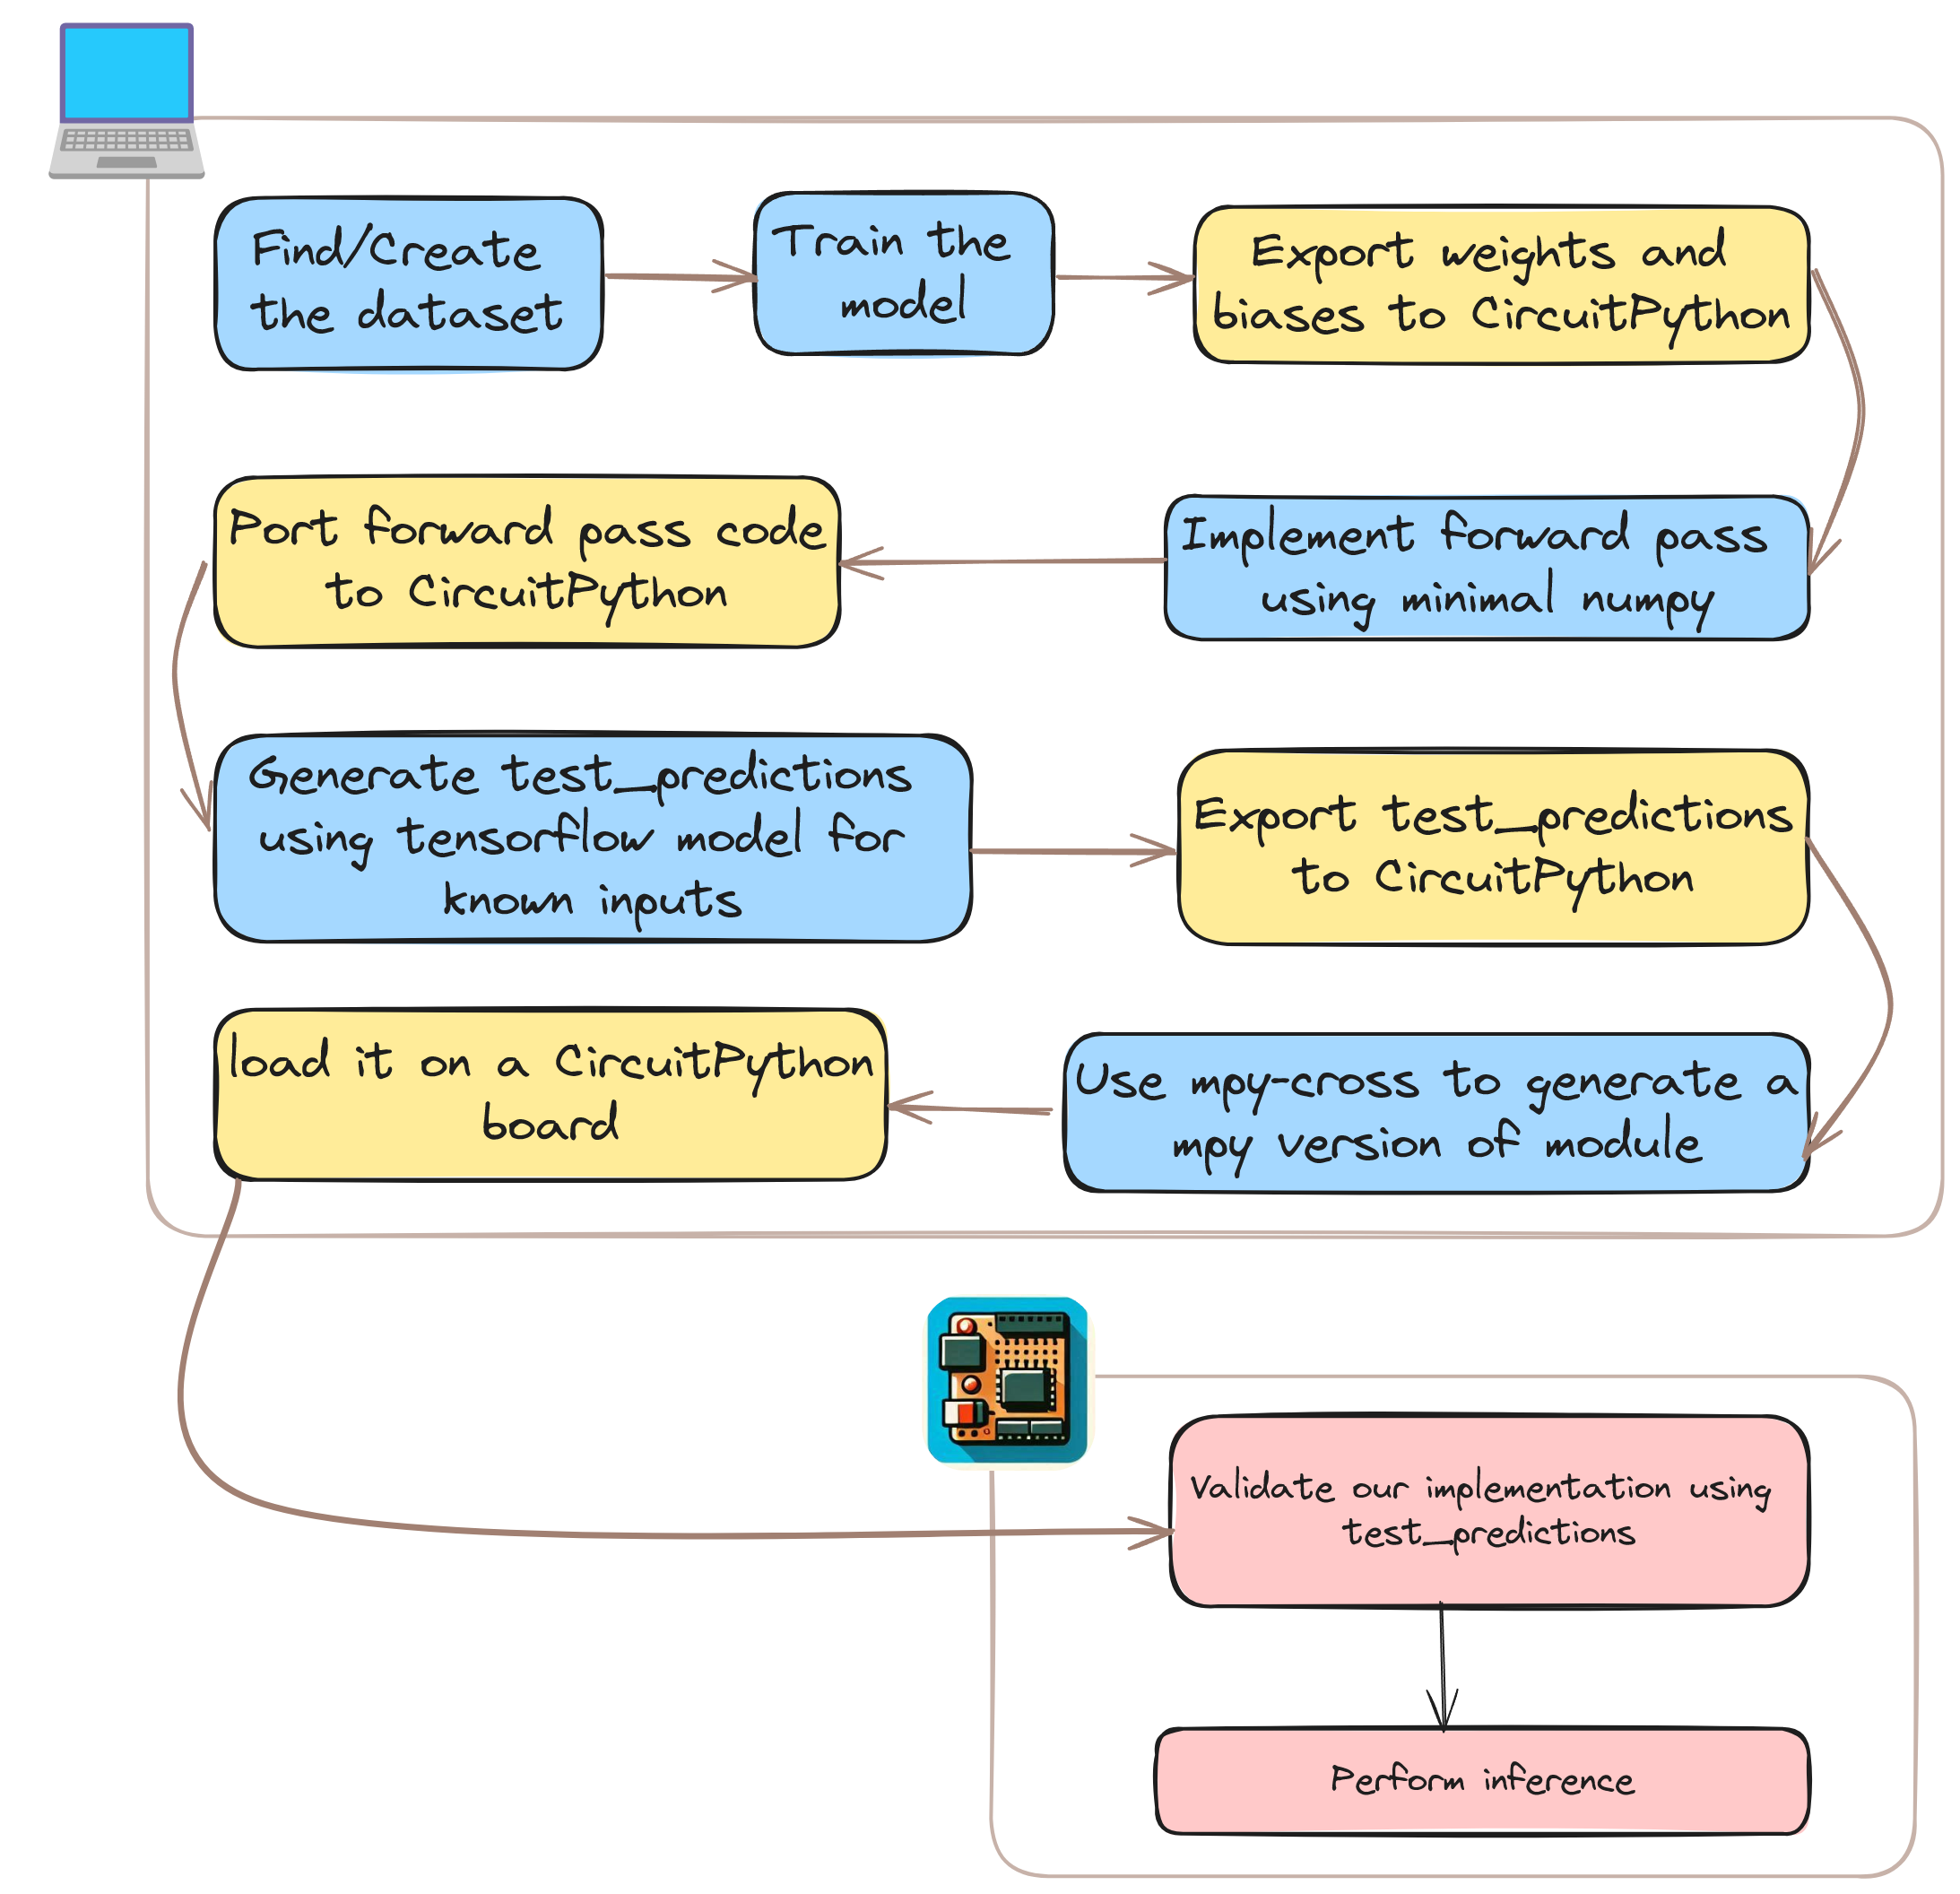
Dataset Preparation
Acquire the dataset and resize images to the smallest possible dimensions. For the MNIST dataset, I upscaled images to 30x30 pixels, but 32x32 should be feasible on most boards running CircuitPython. Using all three color channels can be challenging, so I convert images to grayscale to handle only one channel.
Model Selection
Choose the smallest model possible, with only a few thousand trainable parameters. Larger models are impractical for this setup. Stick to simple layers or those whose operations you fully understand, enabling you to implement their functionality manually during the forward pass. For this experiment, I used a CNN with 3,116 trainable parameters.
Model Training
Ideally, train the model using images captured by your microcontroller, though this may not always be practical. Cameras can introduce artifacts, so be prepared to handle these. Add noise during training if necessary to simulate real-world conditions.
Exporting Weights
Before exporting weights, ensure you understand the input to each layer, the output of each layer, and the dimensions of weights and biases needed at each layer. In my implementation, I convert the weights to CircuitPython variable declarations that can be directly copied and pasted into the inference code.
Converting Weights to CircuitPython
This is a challenging part due to the lack of a direct numpy equivalent in CircuitPython. The closest alternative is the ulab library, which supports only up to 2-dimensional arrays. This limitation requires creative solutions, such as converting weights to lists of ulab arrays or lists of lists of ulab arrays. This presents significant challenges in implementing the forward pass.
Implementing the Forward Pass
Understanding every operation involving weights and biases (and others like max pooling and flattening) down to individual additions and multiplications is crucial. Without the luxury of a full-fledged numpy module, this task can be intimidating but also interesting. Methodically write down each operation on paper and implement them in CircuitPython. Operations like convolution can be particularly tricky and inefficient in CircuitPython.
Validation
After implementation, validate the logic and exported weights. I suggest using the TensorFlow model to generate predictions on known inputs, exporting these predictions, and using them as ground truths to verify the output of our implementation. First, validate the logic on a PC by creating a copy of the CircuitPython implementation with minimal changes (e.g., importing numpy instead of ulab). Once the PC version works correctly, proceed to validate the CircuitPython version.
Full Implementation
The GitHub repository linked below contains the reference implementation of the workflow discussed.
https://github.com/code2k13/cnn_circuit_python
In this implementation, a Raspberry Pi Pico running CircuitPython 8 is used to classify handwritten digits using a CNN. The repository includes all necessary files to implement the workflow. The README.md file provides detailed instructions on using the code. For the circuit diagram and required hardware, please refer to the schematics and details from my previous article.
The code can be easily modified to classify other objects apart from MNIST digits by making small changes to the code, provided the input remains 30x30 pixel grayscale images. However, if the input image size or the number of channels changes, the entire forward propagation code in CircuitPython will need to be rewritten.
It is also important to note that the classification code file is quite large (over 60 KB), and CircuitPython may have issues loading it. To address this, we use mpy-cross, a tool to ‘pre-compile’ or ‘freeze’ CircuitPython modules, creating an mpy file that loads faster.
I hope you find this information useful and feel inspired to try this with different classification problems. Please share your experiments and experiences.


