Simple utility to collect files from clipboard and archive them.
License
DISCLAIMER: This software is provided to you without warranties of any kind. The author is not responsible for any kind of loss arising from use of this software. USE IT AT YOUR OWN RISK. This software is free for PERSONAL use only. If you plan to bundle this software with your commercial application you need to obtain WRITTEN PERMISSION from the author. This program uses the open source SharpZip library that can be obtained from here Contact the author via email address mentioned on this page: http://ashishware.com/FAQ.shtml OR drop a comment.Installation
- If you don’t have .NET 2.0 runtimes you need to download them from here and install. If you already have move to next step.
- Extract the downloaded file to a location of your choice to say ‘C:\myfolder’
- Extract the ‘ICSharpCode.SharpZipLib.dll’ file from downloaded archive to the same folder (C:\myfolder).
Usage
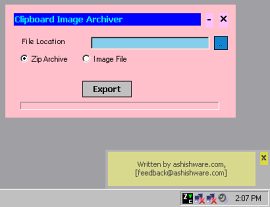
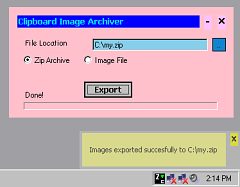
Double click on the ‘ClipboardImageArchiver.exe’ file. You will see the following screen. For now just click the minimize button (‘-‘) on the top right of the dialog. You can move this screen around by dragging the bar on top of it.
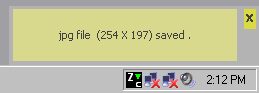
You should see a popup in bottom of the screen and a small icon showing text ‘Zc’.
Copy any image to clipboard. In IE you can right click an image and then click ‘Copy’.
Right click on the task bar icon. On the menu that comes up, click ‘Paste’.
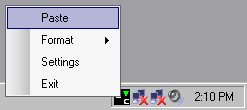
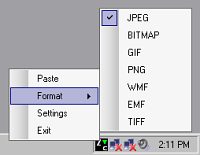
You can change the format in which image is saved, using the ‘Format’ option in menu.
Once you have pasted all images you need, you will want to get them as a zip archive or extract individual images.
Again click on the taskbar icon, and select ‘Settings’. This will bring up the screen in step 1. Select an existing zip file or create a new one say (C:\myfolder\newfile.zip). Press the extract button. Open the ‘newfile.zip’, you should see all images you pasted! SELECTING AN EXISTING ZIP FILE WILL DELETE ITS CONTENTS BEFORE WRITING OUTPUT.
You can also choose to get individual images, by checking the ‘Image Files’ radio and selecting a directory to extract files.
By default, ‘data.data’ file is used for archiving of images. You will find this file in ‘C:\myfolder\‘. If you want to get rid of old archived files, simple delete or rename(recommended) the _’data.data’ file.
Help/Donate
I wrote this program in my free time, with no commercial interests in mind. You can help me in following ways:
- If you found this program useful do write back.
- Please report any bugs or feature requests.
- Add a link to my website.
- Inform your friends about this program.
Thank you !


